
Trying to explore the most remote places of the South America, with the convenience of having our home around, besides de autonomy of staying in isolated areas during a fair period of time, we chose to travel by a camper truck or a moving home, as we like to name it. This is a widespread concept in the North America and Europe, but not so common in Brazil.
We also wanted a versatile system, which would work both in your everyday life and in expeditions to the unknown.
In other words, we were looking for a system where we could easily disassemble and have a normal pick up truck or assemble and get into an adventure. Mainly, we didn’t want to modify things that would affect the original characteristics of the pick up truck, so we don’t have problems if we decide to sell it in the future.
And yes, at the end everything turned out to be possible! So let’s meet our small Transformer!
Designing our Camper
We had 4 months to find, buy, check and adapt our continental house. Besides the fact that we were committed to many personal and professional issues, planning a blog, itinerant projects and also planning the trip. The adventure had already started!
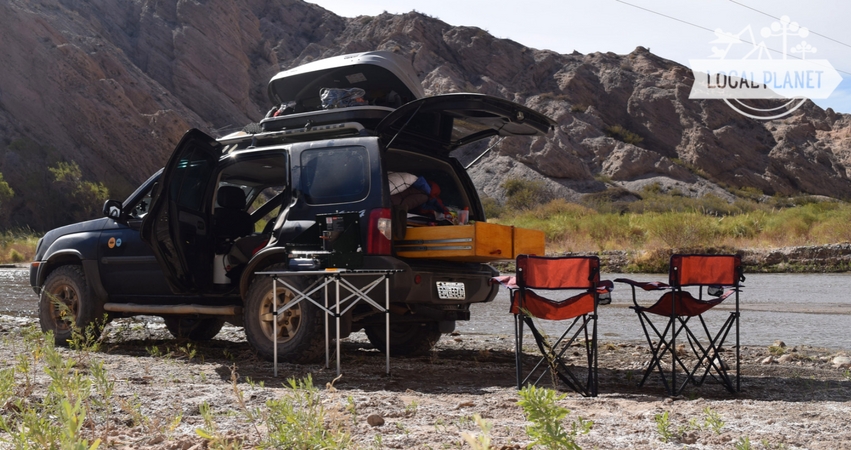
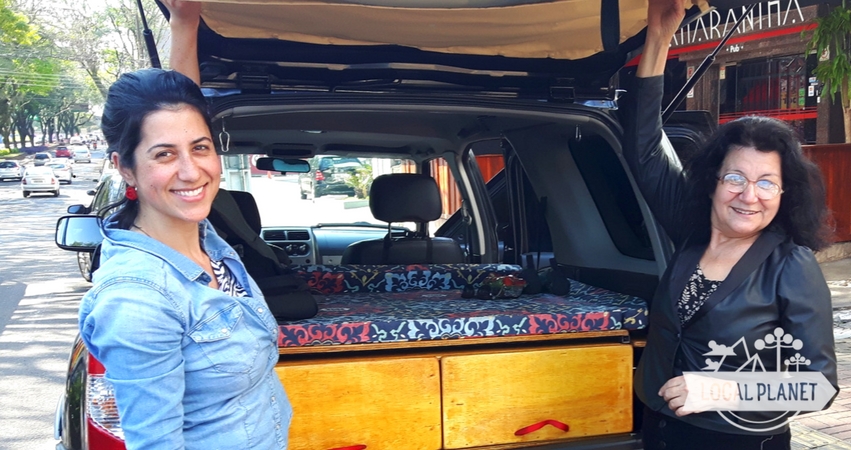
The transformer home is a pick up truck Nissan Xterra 4×4. Since we didn’t find other similar cars that have been adepted to be a house, Manu and I looked for references from other campers and then created our own project.
To do that, we thought about the things of a common house that we would’ve have in our moving home: comfortable bed, kitchen, closet, laundry, etc. Hehe! It sounds like a joke but that’s the way.
From this point, we racked our brains to make everything fit in that tiny space and to access all the resources in a fast and efficient way.

Mobile Building
Soon I realized the obvious, I needed help! From someone wise and friendly to join this crazy idea. Soon it came to my mind the name of a great climber friend of Foz do Iguaçu, Dilson “Zangão” Dantas, who is expert in the challenge of setting up stages and was primordial for the project development and specially in the building.

After a lots of brain racks on the measures, there are many different angles in the car, bulgin and edges, which needed adaptation and creativity, we found out it was possible to complete everything we wanted. So we got into the building.
Bed Project:
- We determined that the bed should be inside the camper, instead of a roof top tent. For security issues, since we thought it would call less attention and we could easily get back to the steering wheel and leave anytime we felt uncomfortable in a place or situation, as it has already happened.
- We got into the following measures: bed of 1,72 cm of height and 1,05 cm of width (from the waist down) and 1,30 cm (from the wait up because of the extra space on the side of the car). This way, with the 1,72 cm of height, we could use the normal driving inclination on the driver’s seat, even with the bed opened up. And if we wanted to get more space, it would only have to put down the front seats – it’s worth saying that I have 1,73 cm of height and have been sleeping comfortably.
- Being demountable, so there is the possibility to have the back seat and be able to take passenger whenever necessary (on the day to day routine we saw that in this way the car logistics gets easier too)
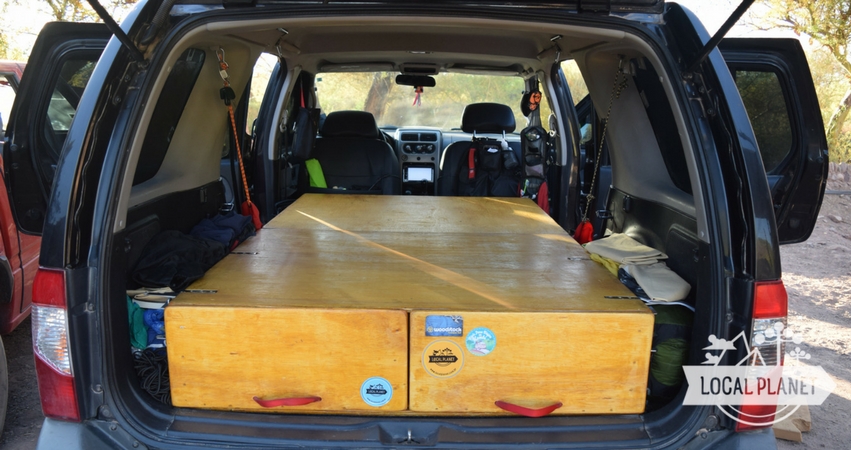
- So it has two parts: one that is on the top of the cabinet with drawers, which is permanent, and the other that is placed on the upper space and we have it set just for sleeping.
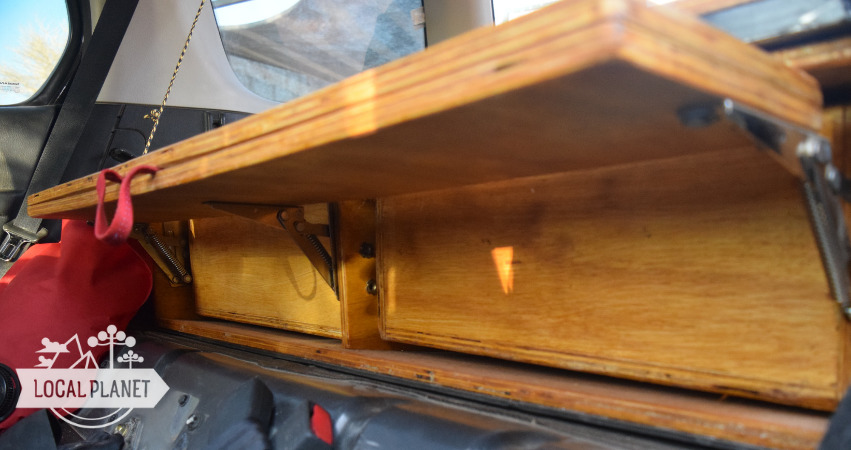
- To set the second part of the bed, one side is supported by its two table leg, which are folding, and the other on a piece of wood supported by wall brackets:
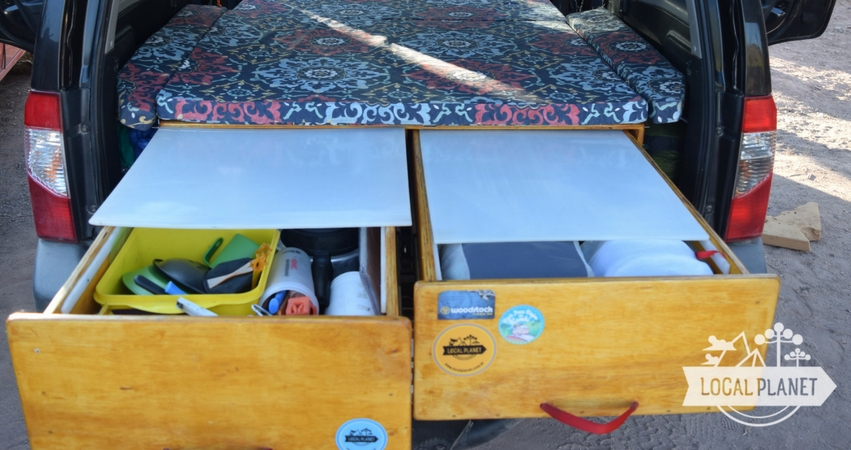
Kitchen and Clothes Cabinet:
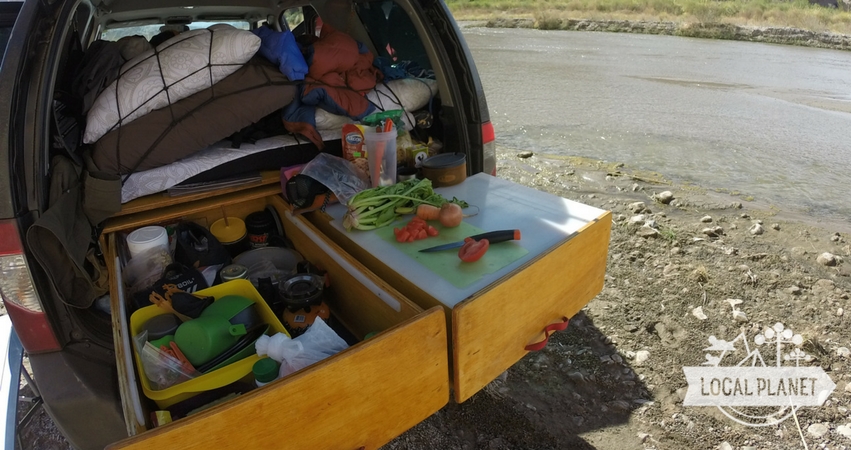
- There are two big drawers, with strong slides and easy accessibility
- With nylon cover, so it can be used as a supporting table and even for quick meal, when we don’t want to take the portable one in the trunk.
- With the following measures: each drawer has 20 cm of height and 50 cm, width and 80 cm of length. Being enough space for our kitchen and closet (hehe!)
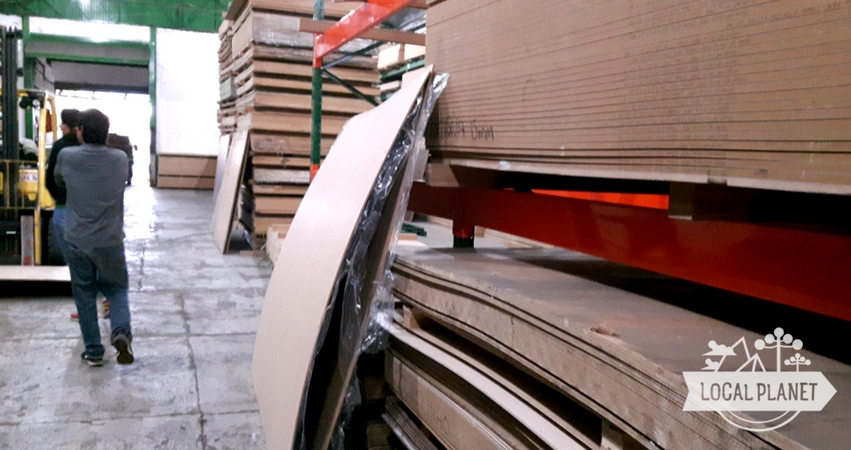
Material used to the camper furniture:
With the measures and drawing in hands, we left to the calculating and material buying part:
- 2 waterproof naval plywood plates 15mm of 2,35×1,50
- 4 pairs of telescopic slide of 500mm, 30 a resistance of 30 kg each. It was used two pairs in each one of the drawers, making it two times more resistant.
- Wood glue and many nails to the building of all the structure of the trunk bed and drawer
- 3 wall bracket hinges
- 4 stretchers, to hold the trunk bed into the original trunk of the vehicle
- A lot of screws of many sizes
- 6 meters of square shaped metallic tubes 20mm, for the extension structure of the bed
- Wood varnish
- 2 meters of round shaped metallic tubes 15mm, for the bed legs
The welding of the “bed extension platform” was done by Toninho from Foz do Iguaçu, welding expert and patient to understand everything we wanted. The plywoods are malleable and could fold. And with this we also designed the legs from the front part of the bed, which we could easily retract when we pushed the platform back, over the drawers.
It’s worth saying that the platform is extremely solid and steady. So I wouldn’t recommend using less resistant materials to not take the risk of the structure be damaged during the trip.
Check the photo of the handmade project very amateur (hehe!), but including everything we needed to know:


Upholstery and Curtains
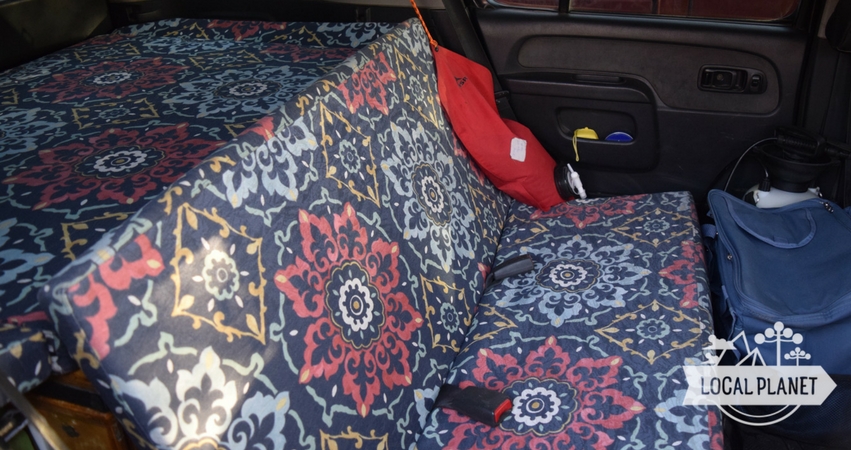
For the camper upholster, we bought a waterproof fabric and 5cm of foam with 30% of resistance. So we took it to an upholstery house, explained in details what we wanted and then they cut and sewed covers to the both pieces:
- One to be part of the bed and also the back seat, so it had a folding part in the middle and holes to pass the seatbelts.
- The other just as a the bed, but with hinges on the side, to make the access to the side free spaces easier
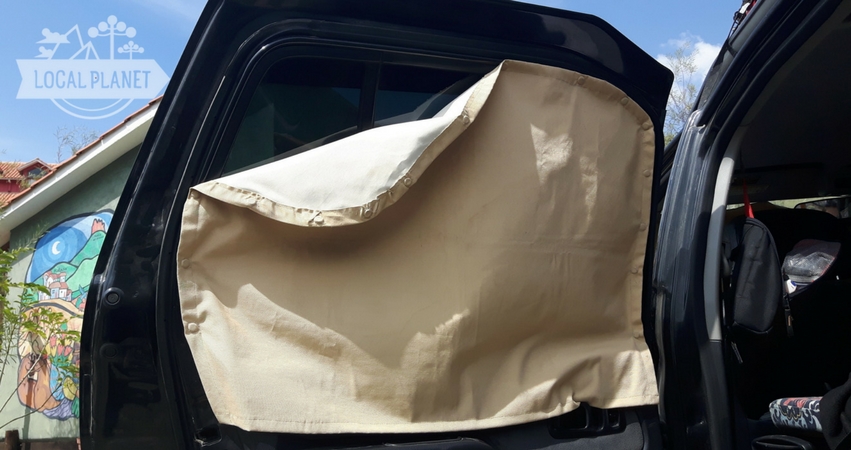
The curtains stage of the camper seemed to be simple, but it ended up being a challenge! First we thought about using internal hooks of the Xterra and install a few more and then pass a steel cable, hanging the curtains. But the windows of the pick up truck are very uneven.
So we had the idea of cutting separate pieces to each one of the windows and fasten the curtains with Iodine magnets, that are very tough and therefore would easily be attached to the internal car body, beside the windows. To do it, we used a thick blackout fabric, so as to prevent the car from the very low temperatures we would find in the way.
Luckily we found a very helpful (and patient) sewer, Ms. Lúcia od Foz do Iguaçu, who produced the curtains custom-made and sewed the magnets one by one with a lot of care.
So as to get it attached to the car, most of the windows have metal around. Only on the backside and front window we had to improvise with metal sheets and 3M tape, as well we used the rearview mirror and installed small hooks on the side as a support help.
Electric Part
To the electric part, we modified 4 substantial parts in the camper:
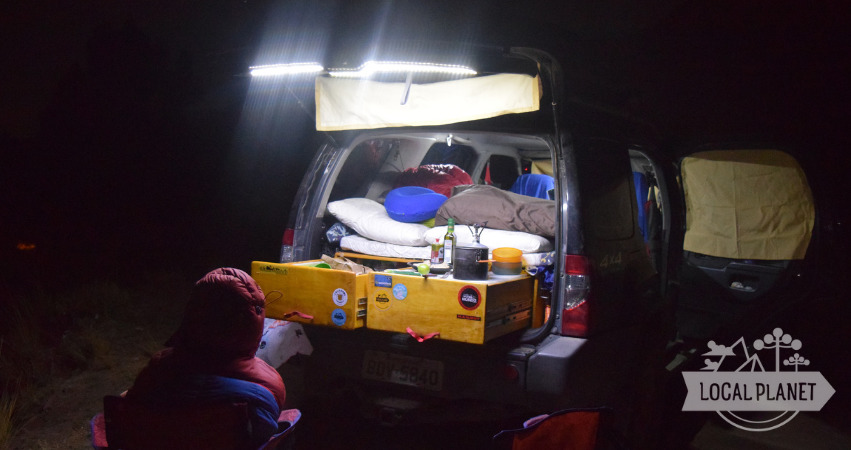
- Led Lights: so as to have a better lightning of our small home, both inside and outside (kitchen drawers access) we installed led tapes in strategic places – in the central part in the middle of the front seats, on the sides, near the backseat spots and on the back door, to lighten the clothes drawer, kitchen and the place we would use the table and chairs. The led lights doesn’t spend much energy, so they don’t overcharge the batteries when we are parked, and also give us an excellent enlightenment to cook on the back of the car and place the table and chairs.
- Energy Converter: we needed 110v energy to charge electric equipment, like laptop, cameras, etc: so we chose to use a current converter from 12V to 110v, with 1000 watts of continued power. The converter was placed under the passenger seat, so as to be in hand and don’t bother on the daily routine. This converter is directly attached to the auxiliary battery that’s going to be explained below.
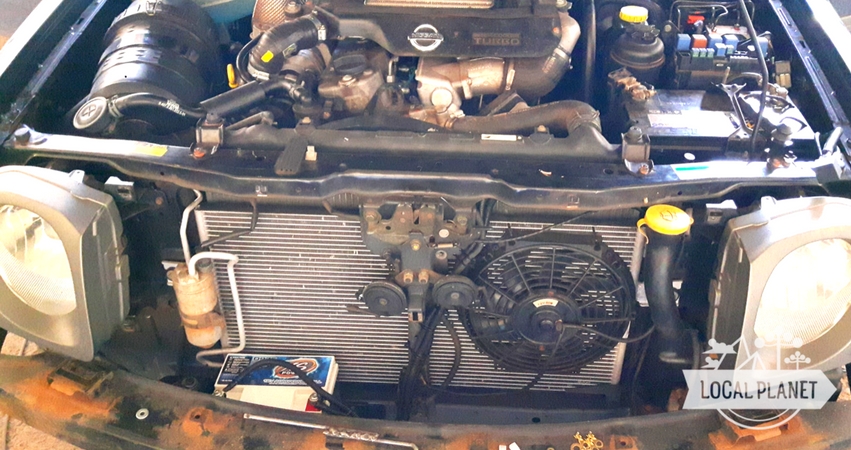
- Auxiliary Battery: so as to have a bigger autonomy, to turn on the lights, charge equipments and the electric cooler: so we installed a gel battery of 35Ahm in the front part of the car, which is directly charged by the car alternator when it’s working, offering an autonomy of at least 2 or 3 days when the car is stopped. This way, the 12V-110v converter is directly attached to this auxiliary battery, which also has a 12V igniter output, giving us tgis option even when we are stopped. Also to keep the cooler on around the clock, prevent the fruit and vegetables to spoil too quickly.
All of the installations were done with a lot of care by the Claudião Som team in Foz do Iguaçu.
Besides this changes, we also changed the main battery to a more powerful one. The original batteries of this car goes around 75 Ahm. However, we knew that the kind of trip we intended to take would require a lot from the batteries: as turning on the car in extremely cold weather, leave the car stopped for some days, using the lights and sound when stopped.
Therefore, I tried to find the the most powerful battery that the car space would allow us to have. We tried a 110 hm, but the only one that fit was the brand Moura of 90 Ahm of power, one of the best national batteries, brand-new, that has kept us away from some problems.
Costs of the Conversion to a Camper
If you also want to travel with more freedom and convert you pick up truck into a camper, there are the costs we had with the inside part of the camper:
Furniture:
- Plywood, slides: R$550,00 (at about U$160)
- Weld and metallic material: R$200,00 (at about U$60)
Upholstery and Curtains:
- Upholstery material and labor: R$380,00 (at about U$110)
- Curtain fabrics, magnets and labor: R$ 480,00 (at about U$140)
Electrical Part
- 1000W Inverter: R$325,00 (at about U$95)
- Gel Battery: R$477,00 (at about U$135)
- Led Tapes: R250,00 (at about U$70)
- Installations Labor: R$300,00 (at about U$85})
Internal part cost = R$2.962,00 (at about U$846)
There were also costs with the outside part of the car, like gutters, roof top trunk, insulfilm on the windows. Also accessories and household items. We’ll have another post about these parts!
Finally…
We also have accessories that complete our expedition car, like stove, kind of a “washing machine”, water filter, reservoirs, shower, etc.
So, being well prepared, it is possible to live comfortably travelling around the planet, with a house inside a 4×4 pick up truck.

This is our conversion from a pick up truck into an expedition camper! I hope it can help and inspire everyone to follow up on their adventures.
Now that we have been on the road for a while, we can say that the camper has been very comfortable and the freedom we got is extremely pleasing. It makes us want to go always further and with less worries!
Did you like the conversion or know someone that enjoys travelling and running away from the traditional tourism? So share it on your social media profile!


 Travel to Brazil: adventure tourism in the Southeast")

